
If there's one technique that separates enthusiasts who maintain their paint from those who accidentally destroy it, it's the two-bucket wash method. This simple yet critical process is the foundation of safe car washing, and mastering it is the first step toward true professional car detailing at home. The method isn't complicated, but understanding why each component matters—and executing it correctly—can mean the difference between a gleaming finish and a car covered in swirl marks that require expensive correction to remove.
Why the Two-Bucket Method Exists
To understand why two buckets are essential, you must first understand what happens during a traditional wash.
The Dirty Wash Water Problem: When you use a single bucket, every time you dip your wash mitt, you're reintroducing dirt, grit, and abrasive particles back into your soapy water . That grit then gets reapplied to your paint on the next panel. With each pass, you're essentially grinding sandpaper into your clear coat.
The Evidence: Those fine spider-web scratches visible under sunlight—swirl marks—are almost always the result of reintroducing grit during washing . The two-bucket method was developed specifically to prevent this by isolating clean soap from contaminated rinse water.
The Equipment: What You Need
Two Buckets: Standard 3-5 gallon buckets work well. Many professionals use buckets with lids to keep them clean between uses. Some detailers color-code buckets—blue for soap, red for rinse—to prevent confusion .
Grit Guards: These are not optional. Grit guards are specialized inserts that sit at the bottom of each bucket . They have a grid pattern that traps dirt below while allowing water to circulate above. When you rinse your mitt, grit falls to the bottom and stays there, prevented from resurfacing by the guard's design.
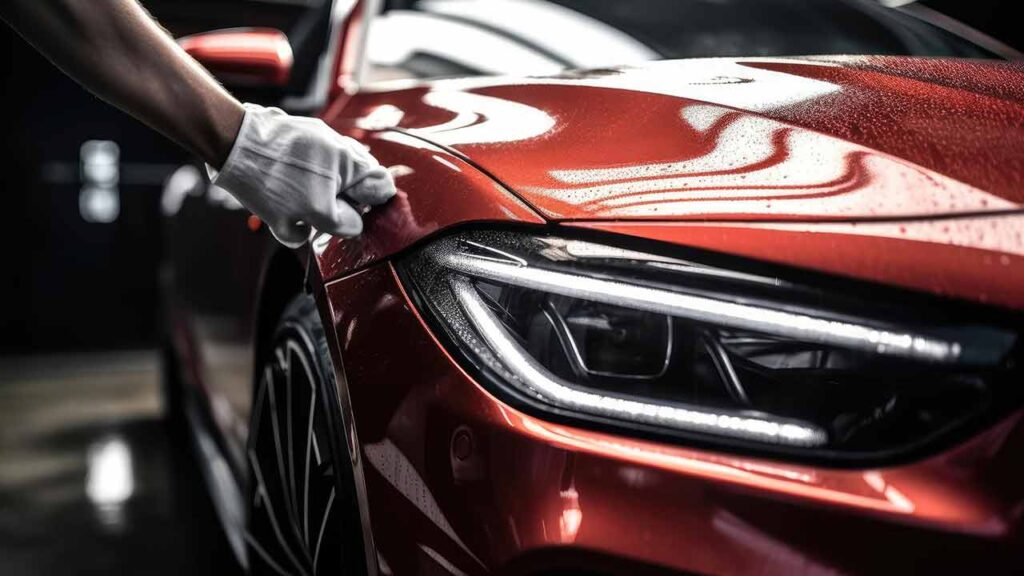
Quality Wash Mitt: Microfiber chenille mitts or wool wash mitts are preferred. These materials trap and hold dirt within their fibers rather than dragging it across paint . Never use sponges—they hold dirt on the surface and act like sandpaper.
Two-Bucket Method Approved Soap: Use pH-balanced car shampoo designed for automotive paint. Dish soap or household cleaners strip wax and can damage clear coats . Quality car soap also provides lubricity that helps dirt glide across the surface.
Grit Guard Washboard (Optional): Some professionals add a washboard-style grit guard that allows scrubbing the mitt against the insert to dislodge embedded dirt more effectively.
The Setup: Before You Begin
Choose the Right Location: Wash in the shade. Direct sunlight causes water and soap to dry quickly, leaving spots and potentially causing soap residue to bake onto paint . Early morning or late afternoon are ideal times.
Cool the Surface: Ensure paint is cool to the touch. Hot panels cause water to evaporate too quickly and can make some chemicals react differently.
Pre-Rinse Thoroughly: Before any contact with your mitt, thoroughly rinse the vehicle with a hose or pressure washer . This removes loose dirt and grit that would otherwise be dragged across paint during the wash.
The Technique: Step by Step
Step 1: Fill the Buckets
Soap Bucket: Fill with water and add car shampoo according to manufacturer instructions . Use the correct dilution—too much soap can leave residue; too little reduces lubricity.
Rinse Bucket: Fill with clean water only. Insert grit guards into both buckets before adding water.
Step 2: The Wash Process
Start from the Top: Always wash from the roof downward. The lower panels are dirtiest and washing them first would contaminate your mitt and spread grit to cleaner upper surfaces .
Work in Sections: Wash one panel at a time—roof, then hood, then upper doors, then lower doors, etc. This systematic approach ensures you don't miss areas and helps track your progress.
Mitt Technique: Use straight-line motions following the direction of airflow over the vehicle. Never wash in circles—circular motions create visible swirl marks that are more noticeable than straight-line scratches .
Light Pressure: Let the mitt and soap do the work. Aggressive scrubbing drives grit into paint and creates scratches.
Step 3: The Critical Rinse Cycle
After washing a panel (or two, depending on dirt level):
-
Rinse the mitt in the clean water bucket. Agitate it against the grit guard to release trapped dirt .
-
Wring out the mitt in the rinse bucket.
-
Dip the mitt into the soap bucket for the next section.
-
Never dip a dirty mitt directly back into soap.
The Grit Guard Effect: As you rinse, dirt settles to the bottom of the rinse bucket, trapped below the grit guard. The water above remains relatively clean, preventing the grit from being picked up again .
Step 4: Final Rinse
After all panels are washed, remove the nozzle from your hose and let water flow freely over the surface. This "sheet rinse" causes water to cling together and run off in sheets, reducing the amount of water left to dry .
Step 5: Drying
Never let a car air dry. Air drying guarantees water spots as minerals are left behind when water evaporates.
The Drying Process:
-
Use a leaf blower or dedicated car dryer to blow water from crevices, mirrors, and trim
-
Use a large, plush microfiber drying towel to blot remaining water
-
Work from top to bottom, using a drying aid or quick detailer for lubrication
-
Never drag a dry towel across paint—fold the towel frequently to expose fresh, clean surfaces
Common Mistakes and How to Avoid Them
Skipping the Pre-Rinse: Failing to pre-rinse means your first contact with the mitt grinds loose grit into paint. Always pre-rinse thoroughly .
Using One Bucket: The entire point of the method is separating clean and dirty water. One bucket defeats the purpose completely .
Circular Motions: Circles create visible swirl marks. Straight lines following body contours are less noticeable and mimic the direction of airflow.
Dirty Towels: Using a contaminated drying towel reintroduces dirt to clean paint. Use clean, dedicated drying towels and wash them with microfiber-specific detergent .
Washing in Sun: Sun causes rapid drying, water spots, and soap residue. Always wash in shade .
Using Dish Soap: Household detergents strip wax, dry out trim, and can damage clear coats over time. Use automotive-specific, pH-balanced shampoos .
The Maintenance Wash vs. The Deep Clean
The two-bucket method is for maintenance washing—regular cleaning when the vehicle has light to moderate dirt. For heavily soiled vehicles or those with bonded contaminants, additional steps are needed:
Pre-Wash Foam: Applying foam via foam cannon before the contact wash loosens dirt and adds lubricity . Let it dwell, then rinse before beginning the two-bucket process.
Decontamination: If paint feels rough after washing, it needs chemical and mechanical decontamination (iron remover and clay bar) before protection is applied .
Why Professionals Rely on This Method
Professional detailers don't use the two-bucket method because it's trendy—they use it because it works. The method:
-
Dramatically reduces swirl marks and wash-induced damage
-
Extends the life of wax, sealant, and ceramic coatings
-
Preserves clear coat thickness by eliminating unnecessary abrasion
-
Creates a foundation for proper protection application
Adapting for Ceramic Coatings
Ceramic-coated vehicles still benefit from the two-bucket method, with slight modifications:
-
Use pH-neutral shampoos specifically designed for coated vehicles
-
Some detailers use three buckets—one for wheels, two for paint—to prevent cross-contamination
-
Drying aids and ceramic boosters can be used in place of quick detailers for coated finishes
Conclusion
The two-bucket wash method is the single most important technique any car owner can learn. It's not complicated, it doesn't require expensive equipment, and it takes only slightly more time than a traditional wash. But the results—a finish free of swirl marks, scratches preserved for wax and coatings, paint that looks better year after year—are profound. Every time you wash your car, you're either maintaining your paint or damaging it. The two-bucket method ensures you're doing the former. For those who prefer expert results without the effort, professional mobile car detailing services bring this meticulous, swirl-free washing technique directly to your location, ensuring your vehicle receives the care it deserves without the risk of wash-induced damage.
Frequently Asked Questions
Do I really need two buckets?
Yes. One bucket inevitably leads to reintroducing grit to your paint. The two-bucket method isolates clean soap from contaminated rinse water, dramatically reducing swirl marks .
What are grit guards and do I need them?
Grit guards are inserts that trap dirt at the bottom of buckets, preventing it from resurfacing. They're essential for the two-bucket method to work effectively .
Can I use the two-bucket method on a ceramic-coated car?
Absolutely. The method is even more important for coated vehicles, as preserving the coating's integrity maximizes its longevity and performance .
What's the best wash mitt to use?
Microfiber chenille mitts or natural wool mitts are preferred. They trap dirt within their fibers rather than dragging it across paint . Avoid sponges and synthetic materials that hold grit on the surface.
How often should I change my wash water?
If the rinse bucket becomes visibly dirty or soap bucket loses suds, change the water. For heavily soiled vehicles, multiple water changes may be needed .
Can I use the two-bucket method for wheels?
Use dedicated buckets and mitts for wheels. Brake dust contains metallic particles that would damage paint if transferred . Many detailers use a third bucket specifically for wheels.
What if I don't have access to a hose?
The two-bucket method can be adapted for rinseless washing. Use a bucket of rinseless wash solution and a separate bucket of clean water for rinsing your mitt. The same principles apply .